Sunday, December 27, 2009

Lighted Crown Molding

In Zanders room I installed lighted dropped crown molding to make it extra special for him. He requested "blue" lights to go along with his favorite color that he wanted his room painted.

First I took a 5" base molding, that will be mounted upside down, and attached 45 degree backer blocks to it for attaching the crown molding. I cut an extra 45 off the edge of the blocks that will form a "V" channel for the rope lighting once the crown molding is attached in place.


Then I mounted all these "backer boards" completely around the room, the top edge is 5" down from the ceiling.


Here's a close up, and also the first couple pieces of crown molding are in place.


Finished product!


Its hard to get a good picture, but this is how it looks at night. Pretty cool!

Thursday, December 3, 2009

Water & Snow

Its been a long time coming, but the plumbing is FINALLY completely stubbed in for the master bathroom. It was such a relief to be done with that and when I turned the water on, there was only 1 leaking joint that I had to resolder. If you notice and are wondering why there are 3 water lines, it because one of them is a cold water return. This bathroom is so far from the water heater (about 70' of pipe) there would be a really long wait for hot water. To eliminate this I will be installing a recirculation pump that pumps water from the hot water line and into the cold return line. This will keep hot water in the lines so when you turn on the sink there will be warm water immediately.


Here's the tub faucet with actual WATER coming out! And no, thats not a blue bathtub.


One of the other projects I'm getting close to completing is Zanders room. Behind that drywall is the chimney. To the right of it is where I will be putting built in book shelves. At the bottom there is the heating duct, I just need to put on the last piece of drywall.


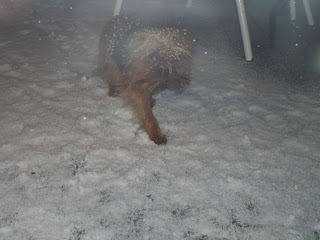
Also, we got our first snowfall of the winter tonight. Sprout was not very happy about that.

Friday, November 27, 2009

Giant hole in the ceiling!

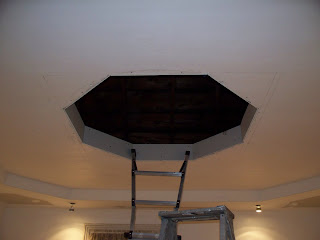
Don't worry, it wasn't a meteor shower or a falling tree. It is an intentional hole cut by my handy saw in the master bedroom ceiling. My buddy Matt came over to help on this one, and after we got everything measured out, we cut the hole and the joists in the ceiling. We then began framing in new headers on the joists that were cut. By that time it was getting late so we called it quits for the night.


The next day I finished up the framing and got all the angled corner pieces installed.

Next it was time for drywall, and this is where I left off today.

When this is all said and done, there will be a prefabricated dome that will sit on top of this octagon. There will be lighting all the way around the octagon shining up on the dome. Originally I was going to have a circular opening, but after going to a concert at the Detroit Opera House, I liked the look of using an octagon. Here's a photo of the super elaborate ceiling.

Wednesday, October 7, 2009

What can I say?

The time has flown by, it was a busy summer, it came and went so fast. Seems like there was always something going on, and it wasn't usually house related! From our annual canoe trip with friends in July, to Christine and me going out to Colorado hiking in August, to a family trip to Downtown Chicago in September. I even made time to train and run a half Marathon on Sept 27th. Thats not to say I didn't get any work done on the house these last couple months either. Zanders room is drywalled and almost ready for paint and carpeting. The blower system is installed and operating on the fireplace. I designed and started planting an English garden out in the yard. Along with various other odds and ends. I will try to get my blog up to speed here shortly. In the meantime here's a few pics.

Horseback riding out in Leadville, Colorado. If you click on the pic you can see the snow covered mountains in the background.


Here's the family walking in a garden in downtown Chicago.


They had some really nice flower gardens.


And yes, here's a pic from in the house. My brother in law Russ is mudding the drywall in Zanders room.

Wednesday, July 1, 2009

Master Bedroom Ceiling update

Here's a quick update on my progress with the bedroom ceiling. I've wired and installed halogen recessed lighting, 2 lights in each corner. I've also began hanging the drywall. Now you can begin to see how the shape will be when it is finished. Still alot of work left though.
A closer view of one of the corners with the lighting.

Stay tuned!

Sunday, June 14, 2009

Bedroom work - Construction and Demo

My dad, Nick and I worked on framing in a part of the ceiling in the master bedroom. I'm not sure what you would call it, a soffit I guess? But anyway, this new framed in area will give the ceiling some "depth" and character, as well as hold the recessed lighting. Its hard to explain exactly what it will look like, you'll just have to wait for the pics!


We did it in 4 sections, each wall 1 at a time. Unfortunately I don't have any action shots of us putting it up.


Meanwhile my mom and Jen started tearing out the plaster walls in one of the other bedrooms upstairs.

Wednesday, June 3, 2009

Dog Fence

I Started putting up a new fence to keep the dogs from escaping, it is really easy to install, you basically just hammer in the posts that connect the sections together and thats all there is to it!
The pile of dirt is what I've been removing from the basement, bucket by bucket, it continues to grow everyday. Where I'm piling it is a lower area that slopes down, I'm trying to make the dog area level, so once I'm done piling on the dirt I can spread some topsoil and grass seed.


Some random pics taken from around the yard...


some of the poppies are blooming.


and the violets.


On a side note, the sump crock is dug down to the proper level, just need to start digging the trenches for the drain pipe that will connect to it.

Sunday, May 17, 2009

Need more support

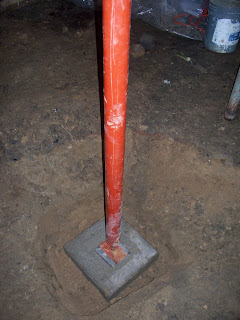
One of the walls in the house has a slight settling problem, you can tell because the door in the wall doesn't shut correctly and the gap above the door is about 1/4" on one side, and the other side is about an inch or more. To fix this, I put in a new concrete footing and a support post that I will be able to lift the settled area back up to where it should be.

In this picture you can see the gap over the door, the left side has a bigger gap, so that means the right side of the door needs to be lifted up. I put the support column directly below the right edge of the door.


Nick is helping fill buckets with dirt while Zander man's his own shovel. He is standing in the hole where the footing will go. Before we started digging, the basement "ceiling" to the floor was about 6-1/2 feet, eventually I will pour a concrete floor in the basement, and when I do, I will want a full 8' ceiling height down there. So, that means the footing and post I'm putting in now, will have to be below the future floor location, or I would have to move it later. What this means now is ALOT more digging. The hole for the footing is about 3' deep, plus we began excavating the surrounding area so the hole wouldn' fill up with water when we get alot of rain. Otherwise my new metal support post would rust away. You can see the black sump crock in the background that will need to be installed BELOW the 8' mark. The end result so far, we've hauled out about 150 buckets of dirt. We've found some old clay pipe, broken glass, a marble and the strangest thing yet was in one area about a foot down we hit concrete. Whats strange about that, is at what point did someone pour a 10'x10' concrete pad in the basement, and then cover it up with a foot of dirt?? I haven't fully uncovered it, so maybe I'll be able to figure out what its for, worst case would be its a tomb with bodies in it! I'll just keep my fingers crossed there is buried treasure under there.


Here's the form for my footing, also the bottom layer of rebar to keep the concrete from cracking apart. The rebar is supported about 2" off the bottom of the hole, if you look close you can see the little wire supports.


Most of the concrete is poured and I added the second set of rebar.


Finished product, all smoothed off, just need to wait for it to dry.


The next day, I set the support post in place to make sure everything fit good. I'll give the concrete a few more days to cure and then I'll start cranking the post slowly and hopefully get everything lined back up on the door upstairs.

Tuesday, May 12, 2009

Springtime is here!

Everything is starting to grow and bloom like crazy! Birds are hatching everywhere, we've counted about 9 nests in the trees in our yard. They have anywhere from 3-5 baby birds in them each. Almost all of the trees I planted have buds or leaves as well!

The apple blossoms are in full bloom.


Baby bunny hiding out in some old ductwork I had laying next to the shed.


Mama robin laying on her babies. She was laying so flat and still!

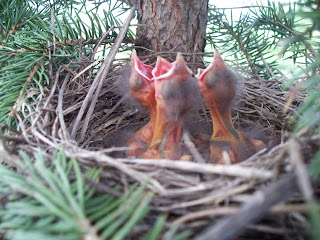
Here's the babies she was protecting.


Another nest that had 5 babies in it, not sure what kind they are.


Check out the video:

Sunday, April 19, 2009

140 trees

My order from the conservation district came in on Friday, over 140 trees. Pines, Oaks, maples, poplars, Redbuds, Dogwood, etc. Luckily I had help planting them, my dad, Nick, Jen and I got most of them in the ground Friday night. I finished up the rest over the weekend, they are all staked and the last thing to do will be to wrap them in chicken wire so the rabbits and deer don't eat them. I chose mostly fast growing trees, some of the poplars grow 4-5' per year, the Maples and White Pines should grow a couple feet per year, and the Oaks maybe a foot or so.

Doesn't look like much when they are all wrapped and in the cart, but there is 140+ trees there.


The boys lending a hand.

Here's a row of White Pines along my back property line that my dad planted. They are about 18"-24" tall.


Hurry up and grow!

Sunday, April 12, 2009

Kids Playset

Christine has been wanting a playset for the boys, so when she found a used one on Craigslist for a decent price, she sent me to go get it. Nick and I went and partially disassembled it so it would fit in my truck & trailer and some in Nicks truck. When we got it home it was pretty easy to put back together as we had left all of the main pieces intact. The boys enjoy it so far, even though its still a little chilly out. Hopefully they play on it this summer. In the meantime I'm still making some progress on the bathroom, just nothing that has provided any interesting photos.


Wednesday, April 8, 2009

Pink and Green

Remember that bathroom I was putting in upstairs? Yeah, its been awhile since I worked on it, but in the last week I've been able to get a little bit accomplished. I started off by putting up plastic sheeting vapor barrier on all the walls. Then I put up 1/2" pink foam insulation. Last up goes the drywall, actually green board in this case, its designed to be moisture resistant to prevent mildew or damage from too many steamy baths. If my mom was decorating, she wouldn't have been able to bring herself to cover up the pink walls!

Here's looking up at the ceiling, the oval cut out is for the inset dome.


The first green board sheet goes up on the wall.
One wall down, three to go.

Sunday, March 29, 2009

Fireplace Hearth Construction

Been a little while since I posted, things have been coming along kinda slowly since I got the fireplace functional. It's easier to just light a fire and sit back, than it is to finish the job!

Here's how its looked for the last couple weeks. All the metal framing is in place as well as the ductwork.


Here's the start of the raised hearth. Those are 2x6's, so when the hearth is complete and tiled, it will be about 7-1/2" tall.


The dogs quickly found their new favorite spot, nice and warm...


Cutting the 1/2" thick, fireproof cement board with a diamond blade. This will line the walls and the hearth. Yes, if you look closely its snowing outside. Where's our nice spring weather?

Here is the hearth with 2 layers of Durock to offer extra protection from the heat. Also the first sections going up on the walls. The next pieces I will need to cut to follow the curves of the top of the fireplace.

statistics history
Dell Computers